Tuesday, August 21, 2007

Monday, June 18, 2007

CRYSTAL LITE REPAIR INSTRUCTIONS

Our Delica experts at JRT has uncover yet another tid-bit to help owners repair the Crystal Lite sun shade. See below for a detailed step by step instruction. Please keep in mind that this job takes about 5 hours to complete. In some cases, if you are lucky you can repair with out replacement parts. However, we have found that the motor is usually the source of the problem and in this case will need to be replaced.
SEARCH FOR DELICA REPLACEMENT PARTS

Start by having a look at the roof and take note of screw placements and and small plastic caps. HINT! Keep your small pieces oraganized.

STEP #1 .......................STEP #2 ..................................STEP #3


#1
The roof is in two pieces, front and rear. Take out all screws & panels to expose the sunshades
#2
Remove light panel and curtain tracks.
#3
Remove hidden screws found under the front roof panel.

STEP #4..................
STEP #5............................ STEP #6


#4
Basicaly, take off as much paneling needed to get at the sun shade motors and tracks.
#5
The shades work on a machanical pully system. A wire runs from each side and back to the motor. The shade is spring loaded; the motor pulls to close & the spring tension pulls to open.
#6
The main problem is the wire will not retract back into motor and gets jammed inside. If you find the wires doing this, a replacement is needed. With all the roof panels off, it is possible to problem solve and fix the shade.

One solution may be to convert the shades to a manual pull style. This would involve putting in better spring retractors and velcro or a snap to keep it closed...sorry haven't done it before.

STEP #7............................
STEP #8............................ STEP #9


#7
First check if the shade is cliped into its track. If so, check the wire going into the motor; have your electrical open/close panel attached. Try opening and closing the shade and watch the wire. If it is not going in or out of the motor, its time for a new shade.
#8
Remove the top window seal.
#9
Remove the cab light unit.

STEP #10.................
STEP #11.......................... STEP #12


#10
There are hidden screws to remove the front shades
#11
Remove air vents
#12
Each shade is its own unit. Its must be replaced in full as the motor and tracks can not be seperated.

STEP #13 STEP #14


#13
Simply remove all screws and the shade will detach.
#14
The black caps hold the spring tension so if these are missing a replacement is needed.
Do not remove!

We suggest ordering new shades before removing the old ones. It does take time, and totally rips apart the interior of the vehicle. Let us know if you deside to replace the shades as we always have units on hand. Any worries, CONTACT US!

Monday, May 14, 2007

THE BIG RIGS

BIG RIG
While we have had a few lifted deilcas, the Big Rig is our first seriously jacked Delica. The whole kit was done by a 4wd shop that specializes in lifting Star Wagons, Space Gears and cruisers. We tracked down the shop who did the lift and now we have access to these parts. Mitsubishi does not make after market lifts for Delicas. Chances are, if your rig was imported with a lift this large, it was probably done by either this or one of a couple other shops that do them . All parts need to me made from scratch, and they make these parts right at thier shops.

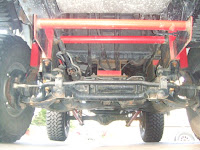


A glimpse at the kit


MACHO
Straight from The Delica Family this is the new addition to the fleet. Its an 8 passenger blue on silver Jasper model in mint condition. The rack is able to carry ski`s snowboards, bikes and is equipped with a retractable mitsubishi awning. Like on the Big Rig, a remote control spot light and dual dash reader. CD/MD/TV/Navi/CB, what else do you need? The entire underbody has been painted a rustproof black with the tranny and engine rebuilt and painted silver. Not one scratch, nick or dent. Almost brings a tear to my eye.


The Kit


FIRST DATE